Quick Start
Through this section, you can quickly know how to use NK260/NK280/NK280B.
Machining processes include the following:
- Return to the machine origin.
- Load a program file.
- Execute fixed calibration.
- Set the workpiece origin.
- Execute machining.
Return to the Machine Origin
This operation is used to adjust the coordinate system before machining.
To return to the machine origin, do one of the following:
For an absolute encoder, skip the operation.
See Set Datum with an Absolute Encoder for the reason.
For an incremental encoder, return to the machine origin with an incremental encoder.
See Return to the Machine Origin with an Incremental Encoder for details.
Load a Program File
This operation is used to load a program file stored in the host or a USB flash disk for machining.
Before loading a program file, do one of the following to prepare a program file:
- Put a program file in the host or a USB flash disk.
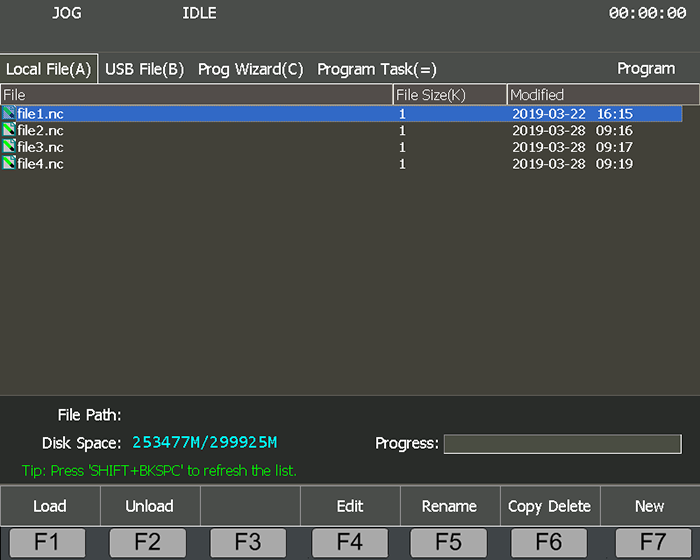
- Press F7 in Local File interface, create a program file, and press F1 to save it.
Taking loading a program file in the local as an example, to load a program file, do the following:
To enter into Local File interface, press
 → A:
→ A:
Press ↑ / ↓, and select the target program file.
Press F1. The system automatically loads the file.
After finishing, the file name automatically shows on the top of the screen.
If you need to unload the file, press F2.
You can also load a program file generated by wizard or load a program task.
See Generate a Wizard File and Execute the Program Task for details.
Execute Fixed Calibration
This operation is used to measure the tool on a certain fixed position of the machine tool to reconfirm tool offset, so as to avoid tool length and the clamping position vary during calibration due to tool damage or other causes. It is mainly used for multi-tool mode and mainly used in machine tool with tool magazine.
Before executing fixed calibration, do the following:
Set the value of parameter Fixed Presetter Position according to the actual situation.
To execute fixed calibration, select a tool and do the following:
To enter into AUTO / JOG / HW mode, press
 /
/  /
/  .
.To enter into Coor-Auto / Coor-Manual interface, press
 → 1.
→ 1.To start fixed calibration, press F5 → F3.
The system automatically records the machine coordinate when the tool nose touches the surface of the tool presetter, and sets the recorded machine coordinate to the tool offset:

Tool offset = Machine coordinate - Machine coordinate of tool presetter surface
Set the Workpiece Origin
This operation is used to define the origin of the workpiece coordinate system (WCS), that is, the workpiece origin.
It can be divided into the following according to the actual situation:
Do Centering
This operation is used to set the workpiece origin for regular-shaped workpieces.
It can be divided into the following according to the workpiece shape:
- Line centering: used to find the center point by two points on regular rectangular workpieces.
- Circle centering:used to find the center point by three points on circular workpieces.
Taking X-axis and line centering as an example, to do centering, do the following:
To enter into Manual mode, press
 /
/  /
/  .
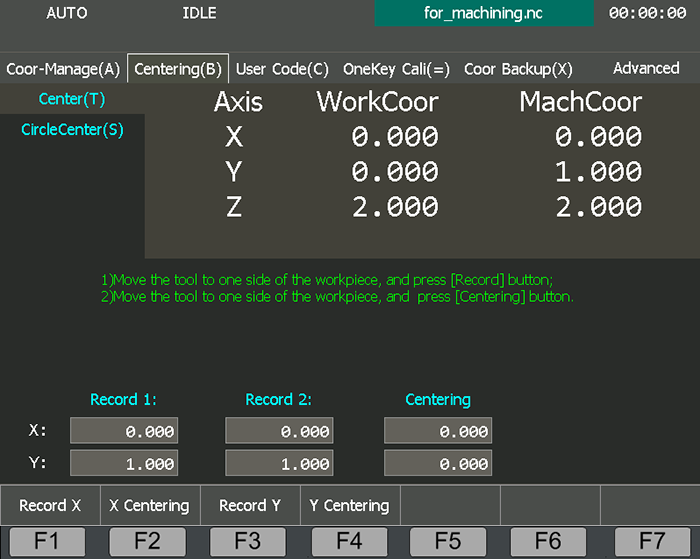
.To enter into Centering interface, press
 → B:
→ B:
To enter into Center page for line centering, press T.
Press 4 / 6, move X-axis to one side of the workpiece, and press F1. The system automatically records the machine coordinate of the current point.
Press 4 / 6, move X-axis to the other side of the workpiece, and press F2. The system automatically calculates the midpoint coordinate based on the coordinate of the current position and records in the last step, and sets it as the workpiece origin.
Do Clearing
This operation is used to clear current workpiece coordinate of each axis and set the machine coordinate of each axis to the workpiece offset. As a result, the workpiece origin turns to zero.
To do clearing, do the following:
To enter into Coor-Auto interface, press
 → A.
→ A.Press F6, and select the target axis to do clearing:
- F1: to clear the workpiece coordinates of X-axis.
- F2: to clear the workpiece coordinates of Y-axis.
- F3: to clear the workpiece coordinates of X-axis and Y-axis.
- F4: to clear the workpiece coordinates of Z-axis.
- F5: to clear the workpiece coordinates of all axes.
Execute Mobile Calibration
This operation is used to set the workpiece origin of Z-axis by executing calibration at the current position.
Before executing mobile calibration, do the following:
Set the value of parameter Mobile Presetter Thickness:
Manually move Z-axis to a certain point over workpiece surface, shift down the tool nose until reaching the workpiece surface, and record the current coordinate of Z-axis (Z1).
Uplift Z-axis, put a tool presetter on the workpiece surface, shift down Z-axis slowly until reaching the presetter and getting the tool presetter signal, and record the current coordinate of Z-axis (Z2).
Get the result of Z2-axis minus Z1-axis, and set it as the value of parameter Mobile Presetter Thickness.
To execute mobile calibration, select a tool and do the following:
To enter into AUTO / JOG / HW mode, press
 /
/  /
/  .
.To enter into Coor-Auto / Coor-Manual interface, press
 → A.
→ A.To start mobile calibration, press F5 → F5.
The system calculates calibration result and set it into the workpiece offset:
Workpiece offset = Machine coordinate - Mobile presetter thickness - Public offset - Tool offset
Generally, the default setting values of public offset and tool offset are both 0.
Set the Offsets
This operation is used to set the workpiece offset and the public offset. The former is used to show the distance of the workpiece origin relative to the machine origin, while the latter is used to adjust the workpiece origin of X-axis, Y-axis and Z-axis for all WCSs.
To set the offsets, do the following:
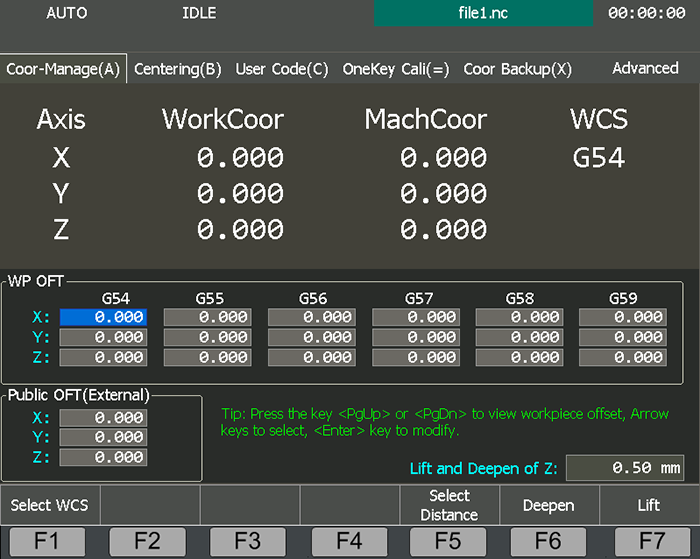
To enter into Coor-Manage interface, press
 → A:
→ A:
Optional: To select the target WCS, do the following:
Press ← / →, and move the cursor to the coordinate column.
Its color turns into light blue.
Press F1 to select the coordinate system.
The WCS name shows in the WCS column of the coordinate display area.
To set the workpiece offset, do the following:
Press ↑ / ↓ / ← / →, and select the target input box.
Press Enter, and input the workpiece offset.
To set the public offset, do the following:
Press ↑ / ↓ / ← / →, and select the target input box.
Press Enter, and input the workpiece offset.
To adjust Z-axis public offset, press F5, set adjusted distance, and press F6 / F7 to deepen (reduce) / lift (increase) the public offset.
Execute Machining
This operation is used to run the program from the beginning to the end.
To execute machining, do the following:
To enter into AUTO mode, press
 .
.To start machining, press
 .
.
The system automatically switches to Coor-Auto interface and executes the program file until the end of block or any intentional interruption.
During machining, you can do one of the following to control machining:
To stop machining in advance, press
 .
.To resume machining from the exact interrupted position when power interruption or E-stop occurs and the workpiece origin is secured, press
 .
.