Set a Mark Point
It is used to set the machine coordinate of the target position as that of a mark point, so as to control the cutting head to return to the mark point as needed.
Before setting a mark point, make sure the system has returned to the machine origin.
To set a mark point, do the following:
To open Mark Point dialog box, do one of the following:
In the drawing toolbar, click
 Mark Point.
In the menu bar, click Machining → Mark Point.
To move the cutting head to the target position, in the machine control bar, click axis button ↑ / ↓ / ← / →.
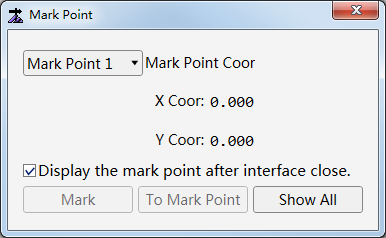
In the drop-down box, select a mark point, and click Mark.
There are 8 mark points at most.
Optional: To show all marked points in the drawing window, click Show All.
Optional: To show the marked point after closing Mark Point dialog box, check Display the mark point after interface closes.
In the drop-down box, select the target mark point, and click To Mark Point. The cutting head automatically returns to the mark point.