Clean Nozzle
Set the gas, pressure, speed, times, path, calibration and auto clean strategy used by the clean nozzle, and the system will clean according to the set rules during auto clean.
Prerequisite:
Make sure all axes have returned to machine origin.
Operation Steps:
Select one of the following methods to open the Clean dialog:
In the menu bar, click Machining → Auto Clean Nozzle.
In the machine control bar, click
 .
.
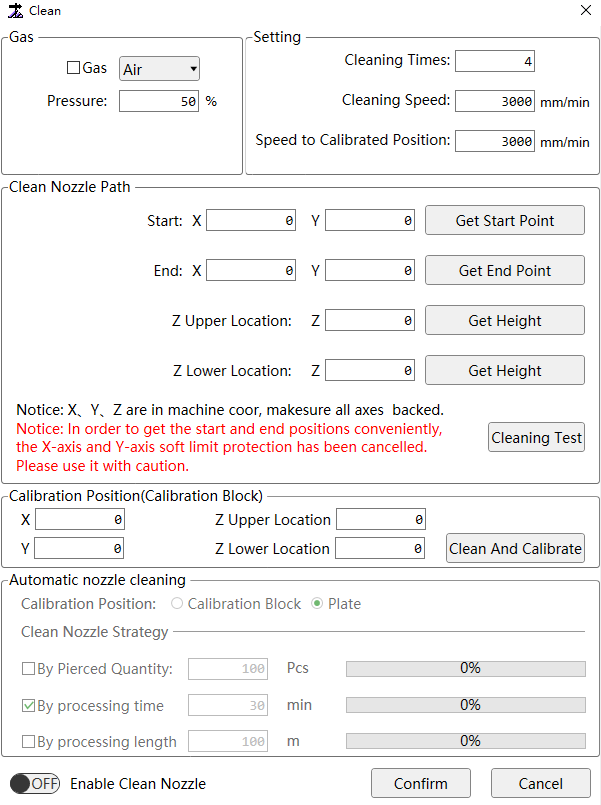
In the Gas and Setting area, set the clean gas, pressure, times, the cutting head movement speed during cleaning and the movement speed to the calibrated position after cleaning.
Set clean path.
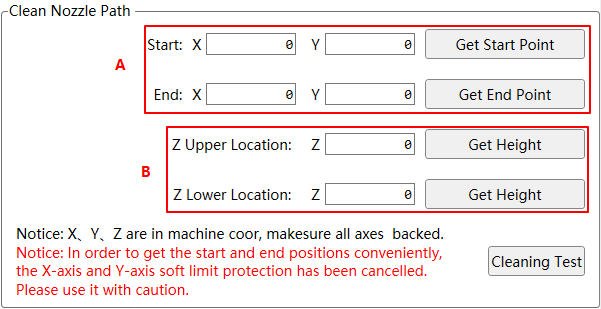
a. Select the following methods to set the motion stroke in the XY direction:
Click the input box after Start: X/Y and End: X/Y to manually input the start point of the clean nozzle stroke.
Move the cutting head to the target position, and click Get Start Point / Get End Point.
Caution
In order to obtain the start and end positions conveniently, the X-axis and Y-axis soft limit protections have been cancelled. Please use with caution.
b. Select the following methods to set the Z-axis positioning height:
Click Z-axis Location: the input box after Z to manually input the position of the clean nozzle.
Move the cutting head to the target position, and click Get Height.
Caution
If two heights need to be obtained for Z-axis positioning, in the menu bar, click Set → System Parameters, and set the parameter Use Different Position of Axis Z for Workbenches to Yes.
- Click Cleaning Test to check whether the cleaning effect meet the requirements.
Caution
Before the cleaning test, make sure that XYZ have been returned to zero.
Optional: If use a block to calibrate after cleaning, you need to set the position of the calibration X/Y/Z axis in the Calibration Position (Calibration Block) area, click Clean and Calibrate to detect effect.

In the Automatic Nozzle Cleaning area, activate and set the parameters.

a. Click Enable Clean Nozzle, set it to ON, enable automatic cleaning and activate the Automatic Nozzle Cleaning area parameters.
b. In calibrate position, select the method of calibrating the position after automatic cleaning, and you can choose Calibration Block or Plate.
c. In clean nozzle strategy, check By Pierced Quantity, By Processing Time or By Processing Length and set the parameters.
If it is checked at the same time, it will start to automatically clean the nozzle when any condition is met, and at the same time clear the accumulated number of perforations, cutting time and cutting distance, and restart the calculation.