Array
It is used to copy the machining objects and arrange them in order, so as to improve machining efficiency.
Array includes the following:
Rectangular Array
Copy the graphic along the rectangular array.
Operation Steps:
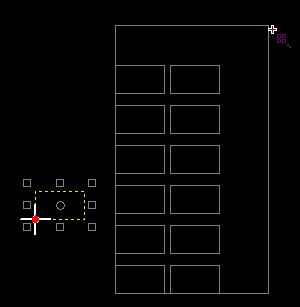
Select the object.
Select one of the following to open the Rectangular Array dialog box:
In the common toolbar, click
 Array.
In the common toolbar, click
Array drop down box → Rectangular Array.In the common toolbar, click Drawing → Array → Rect Array.
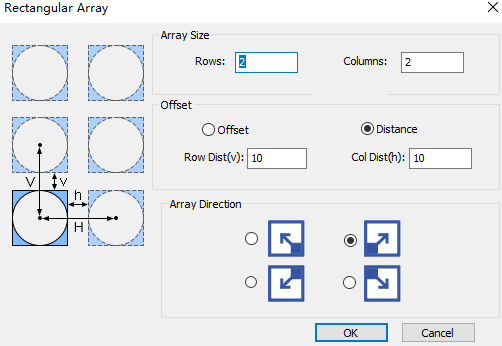
Set the number of rows and columns for a rectangular array.
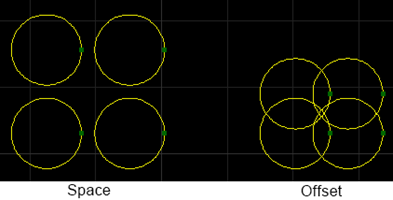
In the Offset area, set the offset method:
Offset: Translate based on the center of the graphic.
Distance: Translate based on the graphic frame.
Select the row and column directions for rectangular arrays.
The result is as follows:
Circular Array
There are two modes for circular array:
- Array by center: Make an array based on the specified circle center coordinates.
- Array by radius: Make a circle array around the currently selected graphic as the reference (circle center).
Operation Steps:
Select the object.
Select one of the following to open the Circular Array dialog box:
In the common toolbar, click
Array drop down box → Circular Array.In the common toolbar, click Drawing → Array → Circle Array.
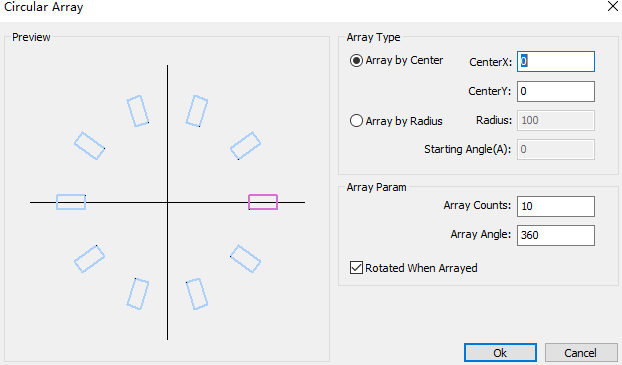
Set the array method.
Array by center: Check Array by Center to set the coordinates of the rotation center point of the circular array.
Array by radius: Check Array by Radius, set Radius and Starting Angle(A) parameters.
Sets the parameters for the Array Param area.
Array Counts: Total number of circles to copy.
Array Angle: Total column offset angle.
Check or uncheck Rotated when Arrayed as required.
The result is as follows:
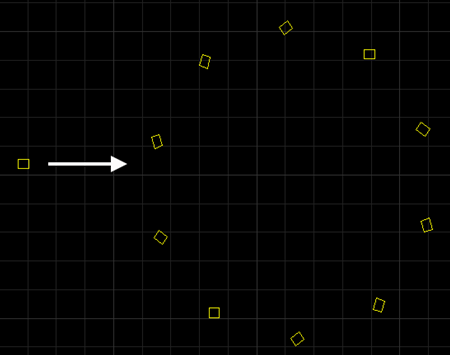
Manual Array
Set the row distance and column distance, delineate the planning area by dragging the mouse, and quickly copy the selected graphics in an array.
Operation Steps:
Select the object.
Select one of the following to open the Manual Array dialog box:
In the common toolbar, click
Array drop down box → Manual Array.In the common toolbar, click Drawing → Array → Manual Array.
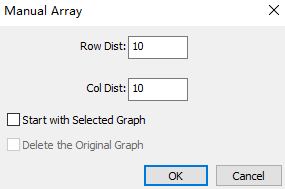
Set Row Dist and Col Dist for manual array.
Row Dist: Translate left and right based on the graphic frame.
Col Dist: Translate up and down based on the graphic frame.
Select the start point for the array.
Take the selected object as the start point:
- Click OK. The cursor turns into
 .
. - Drag the mouse to delineate the planning area, select the end point, and left click.
- Click OK. The cursor turns into
Manually select the start point:
- Check Start with Selected Graph.
- If you need to delete the original graph, check Delete the Original Graph.
- Click OK, left click to select the start position. If need to re-select the start position, right click.
- Drag the mouse to delineate the planning area and the cursor turns into . Select the end point, left click.
The result is as follows: