Chamfer
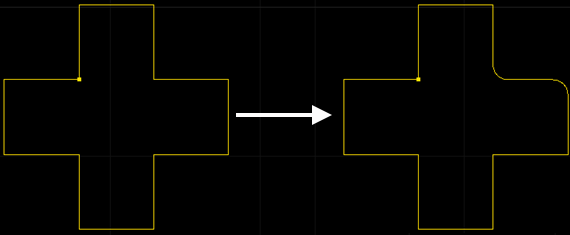
It is used to add chamfers to objects whose angles are less than 180°, so as to improve cutting effect on corners of thick material.
Automatically Add Chamfer
Automatically add chamfers to the selected objects that meet the conditions according to the set value.
Operation Steps:
Select the object.
Select any of the following methods to open the Chamfer dialog box:
In the common toolbar, click
 Chamfer.
Right click to call the shortcut menu, click Chamfer.
In the menu bar, click Technics → Chamfer.
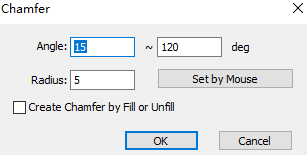
Set the range and radius of the chamfer.
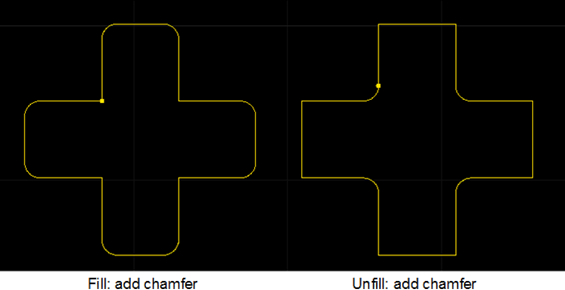
Optional: If the selected closed graphics will add chamfers according to the unfill and fill attributes, check Create Chamfer by Fill or Unfill.
After setting, click OK, and the system will automatically add chamfers to corners that meet the conditions.
The setting range is 45°~90°, and when Create Chamfer by Fill or Unfill is checked, the effect of automatically adding chamfers is as follows:
Manually Add Chamfer
The chamfer position can be selected by yourself. Corner range: 0°~180°.
Operation Steps:
Select any of the following methods to open the Chamfer dialog box:
In the common toolbar, click
Chamfer.Right click to call the shortcut menu, click Chamfer.
In the menu bar, click Technics → Chamfer.
Sets the radius of the chamfer.
Optional: Check Create Chamfer by Fill or Unfill.
Click Set by Mouse, the cursor changes to
 .
.Left lick to select the position of the added point.
Right click or press the Esc key to exit the function of manually add chamfers.
When Create Chamfer by Fill or Unfill is not checked, the effect of manually adding chamfers is as follows: