Berth Point
According to the set berth position, coincide the corresponding point of the graphic with the origin of the workpiece.
For Example: Set the berth point to be lower left, and the lower left corner of the graphic coincides with the origin of the workpiece.
The function of setting the stop point needs to be used in combination with Set Workpiece Origin.
Operation Steps:
In the common toolbar, click
 Berth to pop up the Berth dialog:
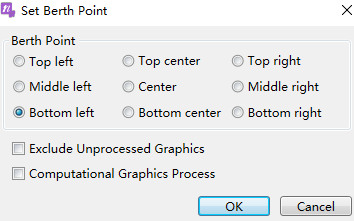
Set the berth point, according to the set berth position, coincide the corresponding point of the graphic with the origin of the workpiece.
Check Exclude Unprocessed Graphics as needed.
Check Computational Graphics Process as needed.
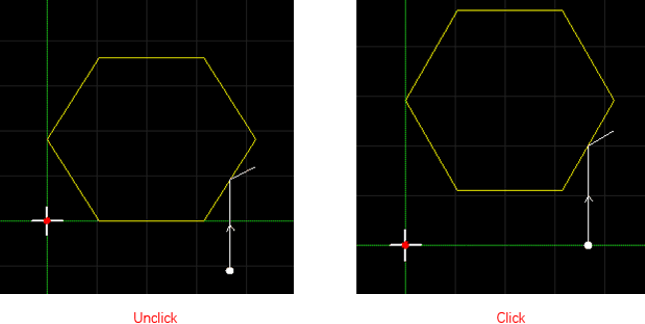
- Check it, and the position of the berth point will be included in the calculation of the technic position, such as the lead line.
- Not checked, the position of the berth point will not calculate the position of the technic, which will cause the problem that the tool path exceeds the soft limit.
Diagram:
Click OK.
Related Tasks:
If you need to automatically apply the berth point, that is, click on the machine control bar  . When the origin is set again, the graphics will automatically berth to the origin of the workpiece coordinate system, then:
In the common toolbar, click Berth drop down button, check Auto Apply Berth Point.