Add a Chamfer
It is used to add chamfers to objects whose angles are less than 180°, so as to improve cutting effect on corners of thick material.
To add a chamfer, do one of the following:
Automatically add a chamfer to the selected and qualified objects according to the set value.
Manually select a chamfer position based on your need.
Angle range: (0, 180)°
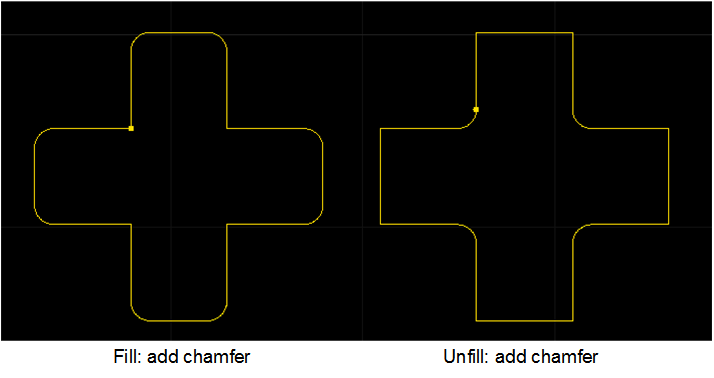
Automatically Add a Chamfer
To automatically add a chamfer, select the target object, and do the following:
To open Chamfer dialog box, do the following:
In the common toolbar, click
 Chamfer.
In the menu bar, click Technics → Chamfer.
Right click on the drawing window, and select Chamfer.
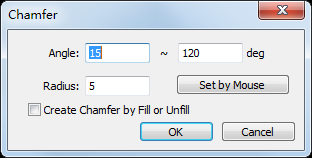
Set parameter Angle and Radius.
Optional: To automatically add chamfers for closed objects according to the attribute of fill/unfill, check Create Chamfer by Fill or Unfill.
Taking setting parameter Angle to 45°~90° and checking Create Chamfer by Fill or Unfill as an example, the result is as follows:
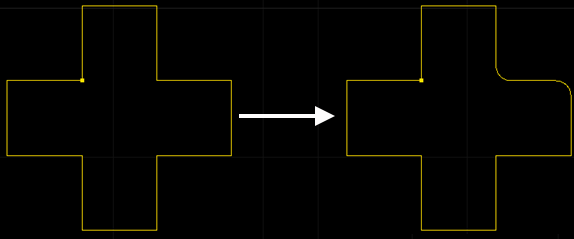
Manually Add a Chamfer
To manually add a chamfer, do the following:
To open Chamfer dialog box, do the following:
In the common toolbar, click
Chamfer.In the menu bar, click Technics → Chamfer.
Right click on the drawing window, and select Chamfer.
Set parameter Radius.
Optional: To automatically add chamfers for closed objects according to the attribute of fill/unfill, check Create Chamfer by Fill or Unfill.
Click Set by Mouse. The cursor turns into
 .
.To select an adding position, move the mouse to the target position and left click.
After manually adding a chamfer, to exit Chamfer command, right click.
Taking unchecking Create Chamfer by Fill or Unfill as an example, the result is as follows: