Change the Machining Order
After drawing several objects, the machining order is the drawing order by default. This operation is used to change the default machining order.
If you need to show the machining order, do one of the following:
- In common tool bar, click
 .
. - In menu bar, click View → Show Order.
To change the machining order, do one of the following:
- Automatically change the machining order.
- Manually change the machining order.
- Specify the machining order for a single object.
- Change the machining order in a list.
Automatically Change the Machining Order
To automatically change the machining order, do the following:
Select the target objects.
To open Auto dialog box, do one of the following:
- In menu bar, click Object → Mach Order → Auto Set.
- In drawing window, right click and select Mach Order → Auto.
Auto dialog box pops up:

Select order strategy and start position.
Color: used to specify the order of layers.
Machining order result shows as follows:
Sheet cutting configuration
According to the selected order strategy and start point, the system generates machining order automatically.
Tube cutting configuration
The system divides the machining object into some sections by break line and machines from bottom to top by default.
In each section, according to the selected order strategy and start point, the system automatically generates machining order.
Manually Change the Machining Order
To manually change the machining order, do the following:
Do one of the following:
- In tool bar, click
 .
. - In menu bar, click Object → Mach Order → Manual Set.
- In drawing window, right click and select Manual Set Mach Order.
- In drawing window, select an object, right click and select Mach Order → Manual.
The cursor turns into
 , and the system automatically shows the machining order.
- In tool bar, click
Select the first target object.
The cursor turns into
 . The machining order on the object turns into 1, and the order of other objects turns into 2,3 ... in sequence on the basis of previous order.
To reset the last order number, right click and select Previous Order.
Repeat step 2 and click the objects in order.
If you need to exit manual setting tool, do one of the following:
- Right click and select Exit.
- Press Esc.
Specify the Machining Order for a Single Object
To specify the machining order for a single object, do the following:
Select the target object.
To open Manual Set dialog box, do one of the following:
- In menu bar, click Object → Mach Order → Specify Single.
- In drawing window, right click and select Mach Order → Specify Single.
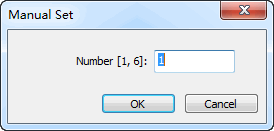
Manual Set dialog box pops up:

Enter an order.
The machining order for the selected object turns to the specified order.
Change the Machining Order in a List
To change the machining order in a list, do the following:
Select an object.
To open List dialog box, do one of the following:
- In menu bar, click Object → Mach Order → Order List.
- In drawing window, right click and select Mach Order → List.
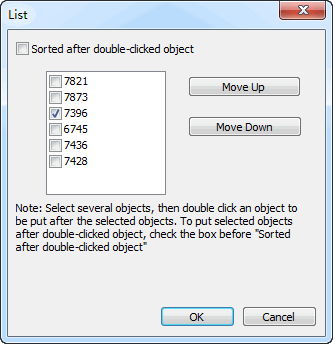
List dialog box pops up:

Check the object, and do one of the following to sort the machining order:
- Click Move Up/Move Down to move the object.
- Double click another object to move the checked object to the clicked position.