Set Scan Cutting
This operation is used to replan a toolpath to find the most efficient path to execute machining by controlling laser on/off, so as to avoid unnecessary tool lifting and feeding and improve machining efficiency.
According to the object type, this operation includes the following:
- Set scan cutting for lines
- Set scan cutting for circles
- Set scan cutting for tiny circles in advertisement text
After setting scan cutting, all selected objects turn into a group.
Set Scan Cutting for Lines
To set scan cutting for lines, do the following:
Select the target lines.
Click Object → Scan Cut → Line Scan. Line Scan dialog box pops up:

Select the start position for cutting, Max Scan Space and Collinear Tolerance.

①: Collinear Tolerance ②: Max Scan Space
Optional: Check Extension Distance.
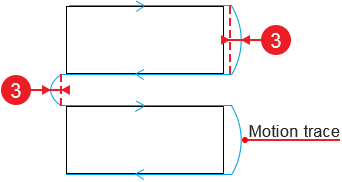
③: Extension Distance
Set Scan Cutting for Circles
To set scan cutting for circles, do the following;
Select the target circles.
Click Object → Scan Cut → Arc Scan. Arc Scan dialog box pops up:
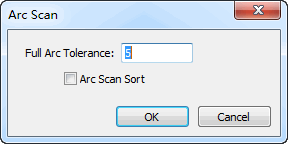
Set Full Arc Tolerance.
Optional: To sort the selected circles by the default array sort strategy, check Arc Scan Sort. See Execute Array for details.
Set Scan Cutting for Tiny Circles in Advertisement Text
To set scan cutting for tiny circles in advertisement text, do the following:
Select the target text.
Click Object → Scan Cut → Scan On Text. Scan LED On Text dialog box pops up:
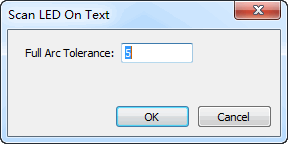
Set Full Arc Tolerance.