Network Connection
Taking Windows 7 computer system as an example, it is about how to manage and transfer files from your PC to NK260 integrated CNC system (hereinafter referred to as NK260).
For network connection, do the following:
Optional: Connect several NK260 products
Set the IP Address
Before setting the IP address, ensure your PC is in the same LAN with NK260. For instance, if the subnet mask is 255.255.255.0, IP addresses from 192.168.1.0 to 192.168.1.255 are in the same subnet.
The method of setting the IP address include the following:
Manual setting with the network cable and switch or a router whose DHCP function is disabled.
Automatic setting with a router whose DHCP function is enabled.
Set the IP Address for your PC
This operation is used to automatically obtain or manually set the IP address for your PC according to the connection way.
To set the IP address for your PC, do the following:
On your PC, click Start → Control Panel → Network and Sharing Center → Change Adapter Settings → Local Connection → Properties. Properties dialog box pops up:
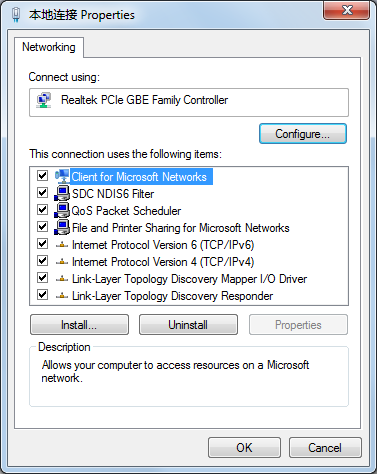
Double click Internet Protocol Version 4(TCP/IPv4). Internet Protocol Version 4(TCP/IPv4) Properties dialog box pops up:

To set IP address, do one of the following:
Select Obtain an IP address automatically. The system automatically obtains the IP address.
Select Use the following IP address and input the IP address, subnet mask, default gateway and DNS server address.
The first three groups of default gateway are the same with those of IP address, and the subnet mask is automatically generated according to the IP address.
Example

Set the IP Address for NK260
This operation is used to automatically obtain or manually set the IP address for NK260 according to the connection way.
To set the IP address for NK260, do the following:
On NK260, press
 → C → F7. Net Info dialog box pops up:
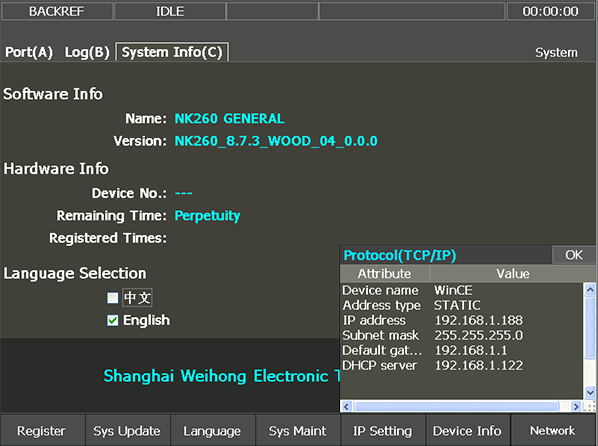
Press F5, input FYRQ in the password dialog box and press
 . IP set dialog box pops up.
To set the IP address, do one of the following:
To automatically obtain the IP address, press L:

To manually set the IP address, press S and input the IP address, subnet mask, default gateway and DNS server address.
The subnet mask, default gateway, DNS server address and the first three groups of IP address should be the same with those of your PC, and the last group of IP address should be different.
Example

Press
for confirmation.
After manually setting the IP address, to validate related settings, power off and restart NK260.
Connect Several NK260 Products
This operation is used to connect several NK260 products via the switch or router, so as to manage network files of these NK260 products by your PC.
Before connecting several NK260 products, ensure the name and MAC address of each NK260 product are different.
To connect several NK260 products, do the following:
To set the IP address for all NK260 products, see Set the IP Address for NK260.
Note: For each NK260 product, the last group of IP address should be different.
Press
→ C → F7, Net Info dialog box pops up.Press F6, input FYRQ in Password dialog box and press
. Device Info dialog box pops up:
Modify the device name.
E.g. WinCE01, WinCE02, WinCE03, etc.
Modify the device MAC to any hexadecimal data.
Press
for confirmation.
Verify Network Connection
This operation is used to verify network connection between your PC and NK260 with a ping test.
ping command: ping + space + IP address of NK260
To verify network connection, do the following:
To open the DOS command window, on your PC, click Start → Run (or press
 +R on the keyboard), and input cmd:
To verify if your PC is successfully connected to NK260, input the ping command and press Enter:
Connection succeeds:

Connection fails:

See Troubleshoot for details.
Share Network Files
This operation is used to manage network files of NK260 via FTP after connecting your PC to NK260.
To share network files, do the following:
To open the network folder of NK260, on your PC, click Start → Run (or press
+R on the keyboard) and input ftp:// NK260 IP address or device name in the bar of file path:Eg. ftp://192.168.1.188 or ftp://wince01.
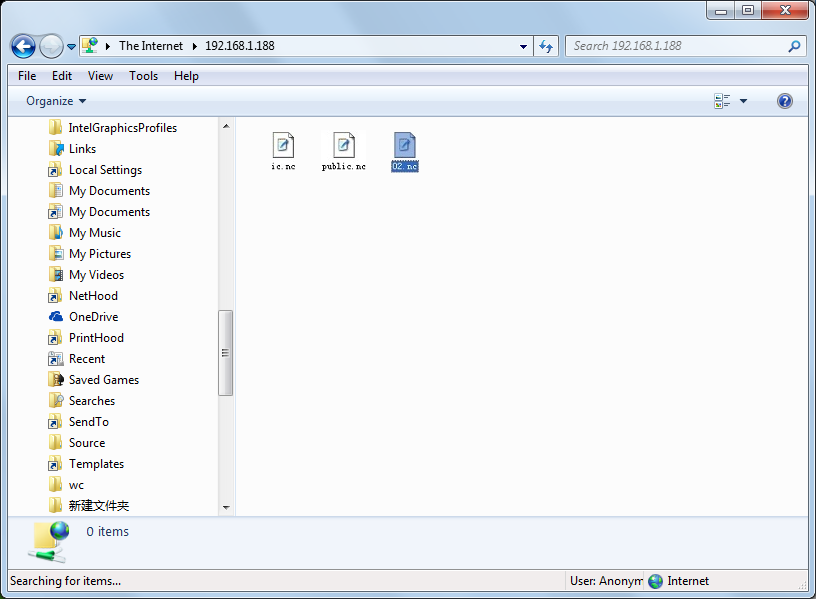
To upload a network file, copy the target network file in your PC to the network folder.
Optional: To delete / rename / copy the network file, in the network folder, right click the target network file and select Delete / Rename / Copy in the pop-up menu.
To check uploaded network files on NK260, press
 → A →
→ A →  +
+ :
:
There is a sign Net in front of each network file in the program file list of NK260.
Troubleshoot Network Connection
If your computer cannot be connected with NK260, to troubleshoot network connection, do the following:
Check if the wiring between your PC and NK260 is correct:
Yes: Proceed to the next step.
No: Do wiring again.
Check if IP addresses of your PC and NK260 are set correctly:
Yes: Proceed to the next step.
No: Reset the IP address, power off and restart NK260.
See Set the IP Address for details.
To check network security settings of your PC, do the following:
Click Start → Control Panel → Administrative Tools → Local Security → Local Policies → Security Options and find Network security: LAN Manager authentication level:
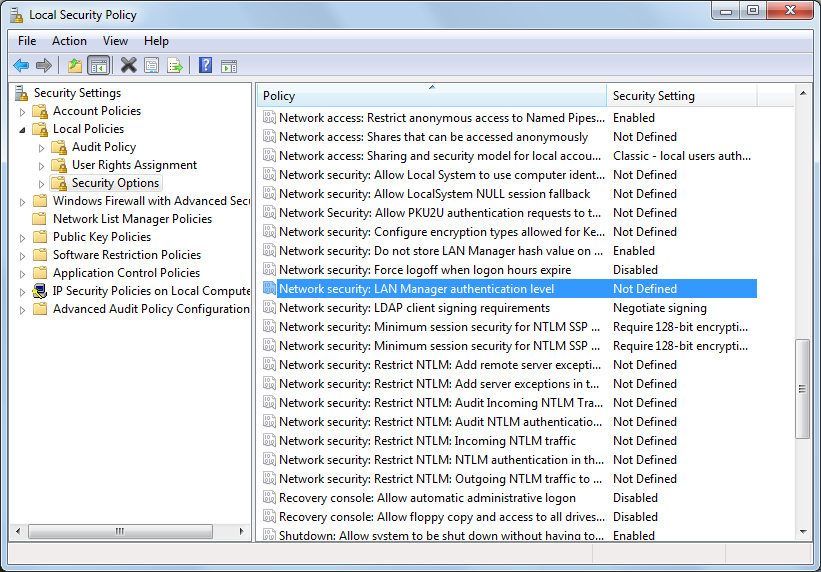
Double click Network security: LAN Manager authentication level. Network security: LAN Manager authentication level Properties dialog box pops up:
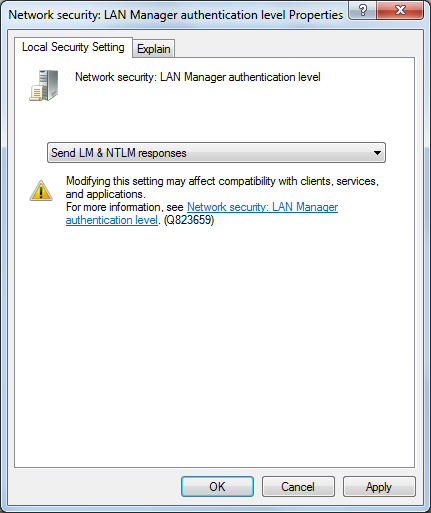
Check if the local security setting in Local Security Setting interface is Send LM & NTLM responses:
Yes: Contact us.
No: Modify it to Send LM & NTLM responses, click OK and restart your PC.