Retrieving contour from JPG file
By setting related parameters, the control system can automatically retrieve contour from a JPG file.
Do the following to retrieve contour from a JPG file.
Steps
Launch NcStudio, and switch to NcEditor interface.
Click File → Import JPG file.... A dialog box named Open opens.
Select the target
.jpgfile. A dialog box named Contour Param opens.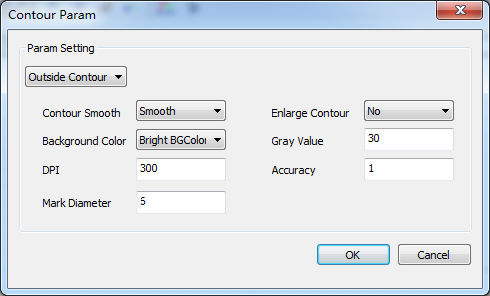
Set related parameters. See Related parameters for details.
Click OK.
By default, the system will automatically do followings to deal with the imported .jpg file and retrieve the contour.
- Converting color to grayscale according to setting value of Grayscale parameter.
- Pixel scaling.
- Adjusting distance between marking points.
- Automatically recognize marking points.
- Finishing contour retrieving.
Related parameters
Followings are related parameters that influence the contour retrieved from JPG image. You can get how each parameter works through comparision and make your own decision.
Inner or Outer Contour
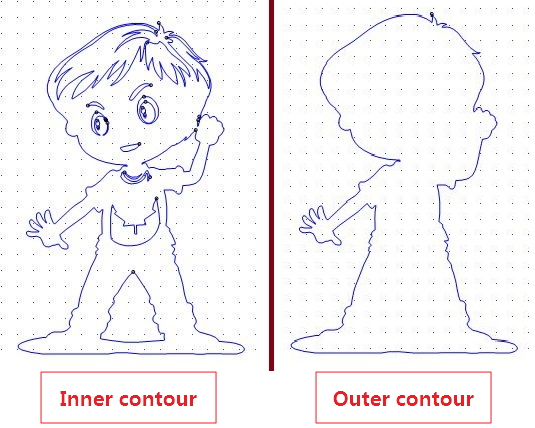
Inner contour means to retrieve the inside part of the imported .jpg file.
Outer contour means to retrieve the outside part of the imported .jpg file.
See figure below for comparision.
Smoothing contour
To smooth or not smooth the contour.
If the imported image file has relatively low resoultion or the edges of the contour are vague, use the Smoothing contour function to remove bad points and smooth the path.
See figure below for comparision.

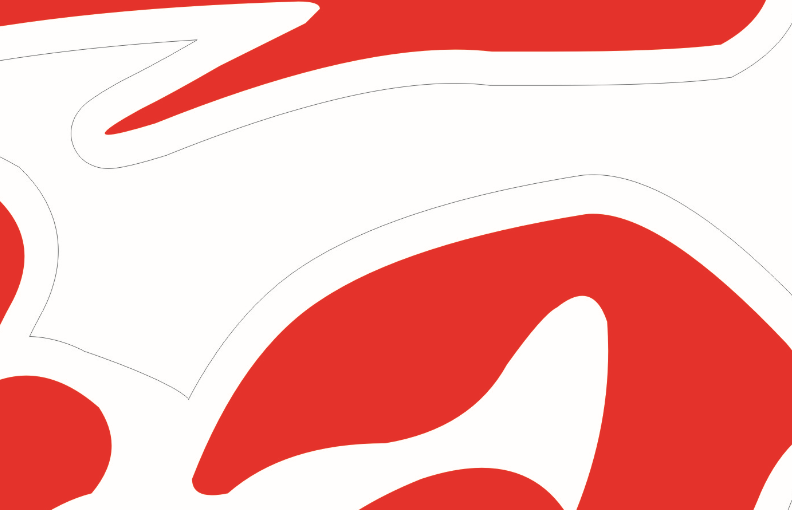
Enlarge contour line
To retrieve relatively thin lines, use Enlarge contour line function to magnify the contour.
It does not affect the actual machining size.
Background color
Choose the background color according to the imported image.
See figure below for images with bright color background and dark color background.

DPI
Dots Per Inch, is a measure of spatial printing or video or image scanner dot density, in particular the number of individual dots that can be placed in a line within the span of 1 inch (2.54cm).
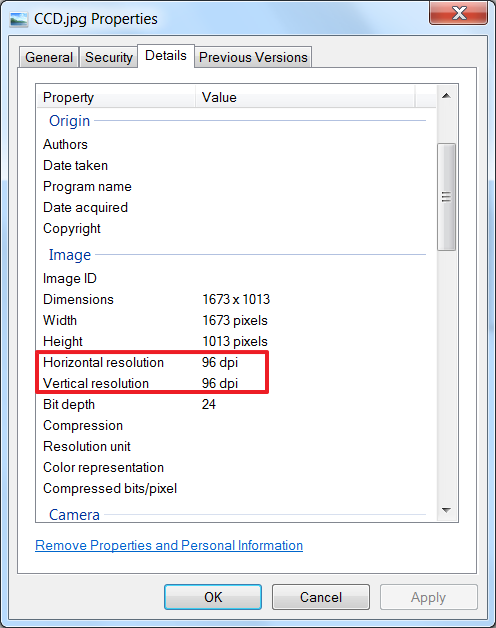
How to check DPI of an image:
- Right-click on the image file, and select Property.
- Switch to tab Detail. You can get detailed information about the image.
Greyscale
In photograph, computing, and colorimetry, a greyscale or greyscale image is one in which the value of each pixel is a single sample representing only an amount of light, that is, it carries only intensity information. Images of this sort, also known as black-and-white or monochrome, are composed exclusively of shades of gray, varying from black at the weakest intensity (0) to white at the strongest (255).
Best practices for setting greyscale:
- For images with light color backgroud, set low greyscale.
- For images with dark color background set high greyscale.
See figure below for comparision.

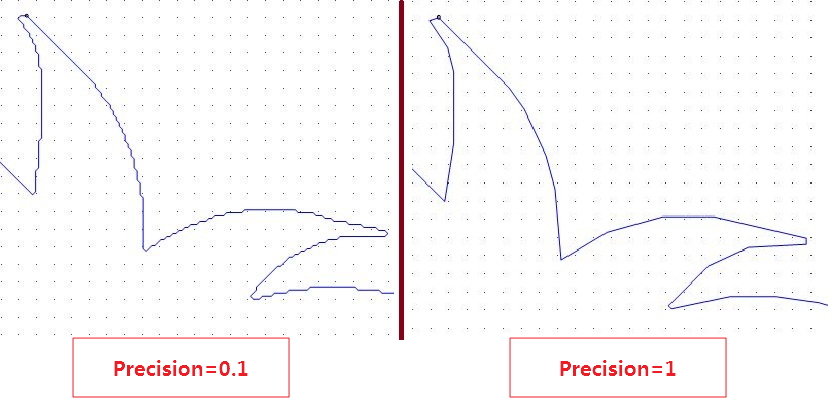
Precision
Default value is 1.
Precision will affect the distance between two marking points and how many marking points can be retrieved.
Relationship among precision, distance between marking points and number of marking points are:
- Higher precision, larger marking points distance, less marking points.
- Lower preision, smaller marking points distance, more marking points.
See figure below for comparision.
Marking point diameter
At present, the system can automatically recognize marking points of circular type.
For marking points of circular type  , the sytem will do the following:
Calculte the contour area of the circle.
Area = πr² //r represents circle diameter, namely, the setting value of <strong>Mark poing diameter</strong> parameterMake a threshold according to the result of circle area.
Threshold: [-(20%*Area), +(20%*Area)]According to the threshold, pick out all circles whose diameters are within the range and make them marking points.
For circles whose diameters are smaller than the minimum value of the threshold, they will be recoginzed as useless points and be ignored in retrieving process.